
![]()
![]()
![]()
![]()
![]()
![]()
![]()
![]()
![]()
![]()
![]()
![]()
![]()
![]()
![]()
Adding a PowerPoint Presentation (scroll down through page for screen shots and step by step directions)
Adding a PowerPoint Presentation:
This tutorial describes how to use the Presentation Tool for viewing of a PowerPoint presentation. The process of converting/uploading and viewing the Presentation would be the same for both Windows and Macintosh systems.
1. Create and save a PowerPoint presentation (this particular tutorial is for a presentation that is NOT narrated)
2. To convert your saved presentation to the correct format for the Laulima Presentation Tool, go to Save and select Save as and choose the format for "GIF" (if using very detailed images in your PowerPoint you might want to choose JPEG but it will create larger files), make sure you know where you are saving the files that will be produced (I usually save to the Desktop - it will automatically create a folder for you in which all the files will be saved to), then click Save

3. IF you open the folder on your desktop you should see multiple .gif or .jpg files, these will need to be uploaded to your Laulima course

4. Log into Laulima at https://laulima.hawaii.edu, select the appropriate course or project site to upload the presentation to, then click on Resources in the Course Menu

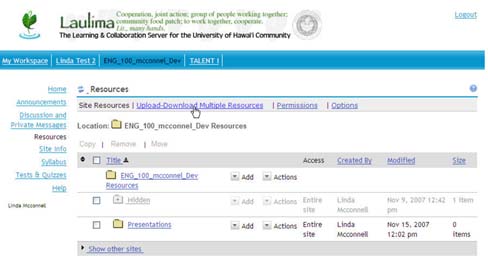
5. Create a folder that will be recognized by the Presentation Tool (this folder will actually contain all your uploaded powerpoints) by clicking on the down arrow by "Add" and select the link for "Create Folders"

6. Enter the title "Presentations" EXACTLY as spelled with a capital "P" and an "s", click "Create Folders Now"

7. Once the Presentations folder is created click on the link in the menu bar for "Upload-Download Multiple Resources" (we are getting ready to upload those powerpoint files that we saved to our computer earlier INTO this new Presentations folder using WebDAV)
8. On Windows click on the text link under the header for "If you are using Internet Explorer in Windows XP, you can go directly to this site's resources folder by clicking the link" - you will then be asked to log in using your UH username and associated password, then click OK

9. Once the WebDAV window is open you should see your Presentations folder, open your PowerPoint folder now that is on your Desktop, then click ONCE on your PowerPoint folder that contains all the .gif or .jpg files, hold the mouse key down and DRAG it right on top of the Presentations folder in the WebDAV window and let go of the mouse!

10. Once you let go of the mouse you should notice that the files are being copied over, wait till all files have been copied

11. Return back to Laulima and the course/project site, we now need to ADD the Presentation Tool by clicking on the Site Info link in the Course Menu

12. Select the link for "Edit Tools" in the menu bar

13. Scroll down and select the checkbox for "Presentation", click Continue

14. Click "Finish"

15. To view the Presentation, click on the Presentations link in the Course Menu, then click the link for View

16. Your presentation is now successfully linked to the Presentation Tool, you can continue to upload presentations in this manner through out the semester, the menu in the Presentation Tool will just get longer with each presentation added

Return to Main Tutorial Menu