
![]()
![]()
![]()
![]()
![]()
![]()
![]()
![]()
![]()
![]()
![]()
![]()
![]()
![]()
![]()
Blogger Tool (scroll down through page for screen shots and step by step directions)
Using the Blogger Tool
As an instructor you can choose to add the Blogger tool to a course for students to use as a vehicle for expressing ones comments and promoting conversation/interaction amongst peers based on a course topics. Depending on the settings, students can create their own blogs or just edit/add comments to a blog started by the instructor.
A Blog, much like a Wiki is a system of posting, editing and manageing a collection of hypertext pages usually dealing with a topic or purpose. This tutorial covers, creating a new blog, adding images, adding links, and adding comments to someone else's blog.
Login to Laulima (https://laulima.hawaii.edu), and go to the Blogger tool from the Course Menu.
If you do not already have the Blogger tool added to the course, please refer to the Laulima tools & Examples of Usage tutorial at the top of the page.
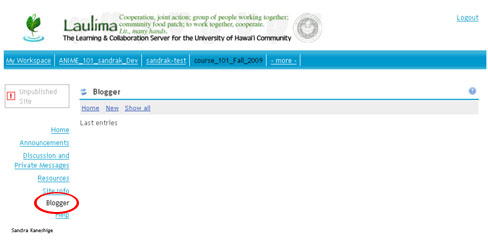
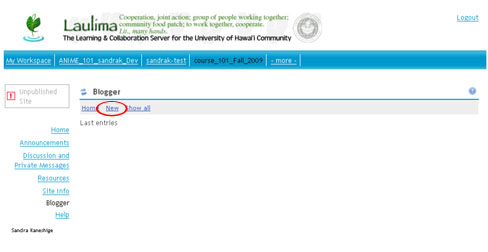
To post a new Blog
1. Click on "New" in the menu bar.
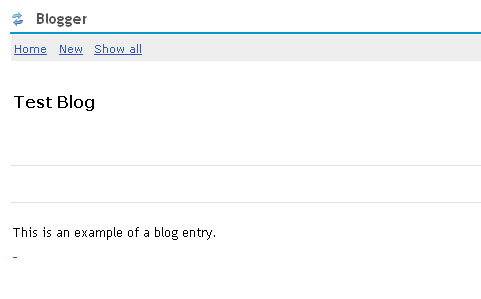
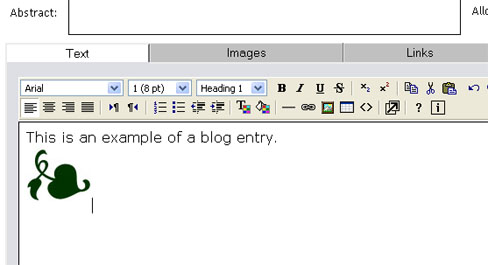
2. It will take you to the editor page, that should look like the image below.
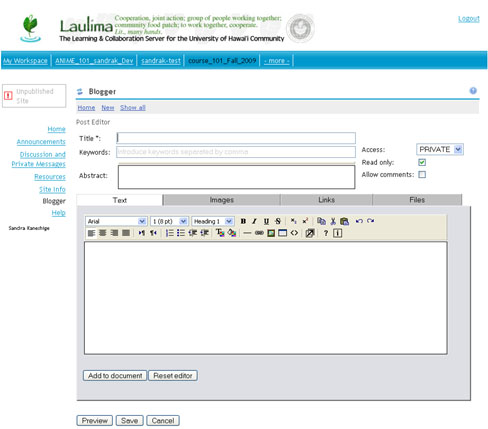
3. You must add a title and type in the initial entry (or posting) for the blog. You can also edit your entry by using the edit tools.
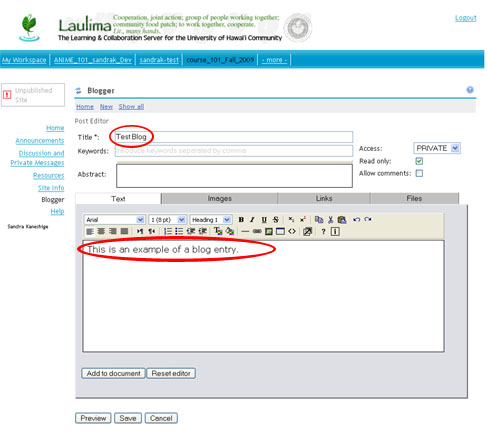
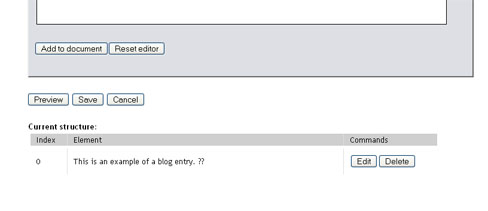
4. Once you are finished typing your text, click on "Add to document".

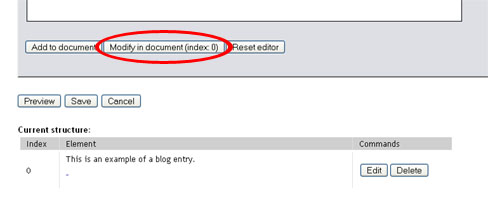
5. Your text has been added to a document area for the blog. This area is shown at the bottom of the page and shows the current structure of the blog document. You can edit and delete this text by clicking on the "Edit" and "Delete" buttons on the right side of the text.
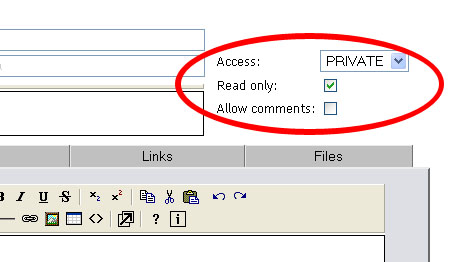
6. You can select the access level of the blogs as well as allow other users or students to add comments to the blog entry.
If you set it to PRIVATE, only you will be able to view this blog. If you set it to SITE USERS, other members of that site (students) will be able to view it.
**Others outside the site will not be able to access it unless the site is made available to the public.
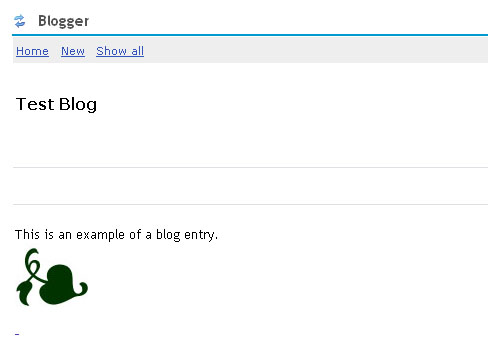
7. Click on "Save" and you should see your blog posted.
To add an image
1. To add images and links to the blog, click on the "Images" and "Links" tabs at the top of the blog editor. The links will be added at the bottom of the blog. If you would prefer, the text editor can also add images and links within the text that you have written.
You can do this while you are still editing your text, or add it later by clicking on the "Edit" button. Place your cursor where you would like your image. And click on the "insert/modify image" icon.

2. This will bring up a window that will ask you for the URL for the image.
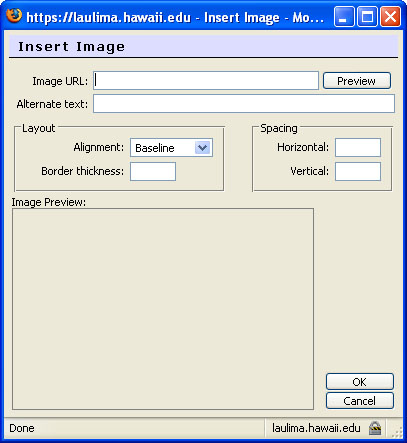
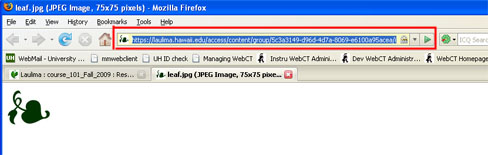
You must have your image already uploaded to your Resources folder. To get the URL for the image you need to go to "Resources" in the course menu and click on the image file.

Copy the URL from the address bar at the top of the window. You can do this by highlighting the entire URL and then going to Edit and click on Copy, or (for Windows) right click and click copy, or (for Windows) hold down the control key and press the "C" key, (for Mac) hold down the command key and press the "C" key.
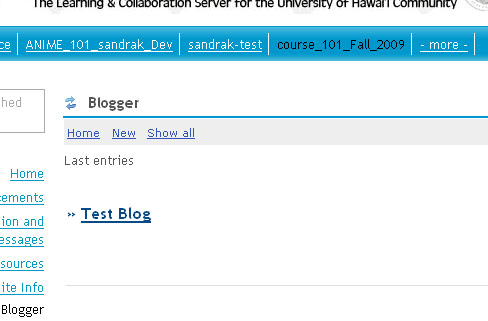
Go back to the "Blogger" tool. When you first go back to the Blogger tool, you will see the list of blog entries.
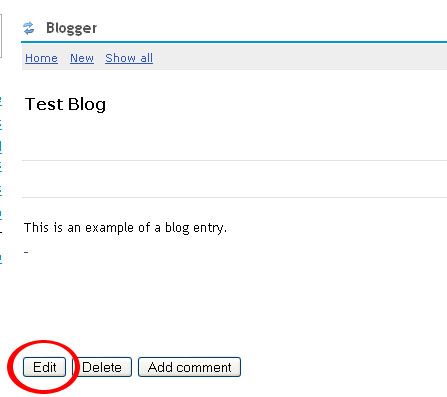
Click on the blog you want to work on then click the Edit button on the bottom of the blog. This will take you back to the blog editor page.
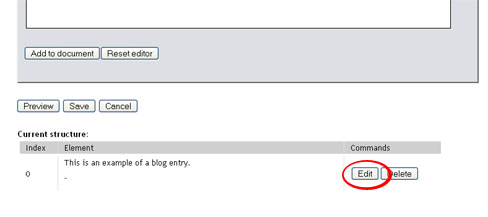
Click on the "Edit" button at the bottom of the page, under "Current Structure".
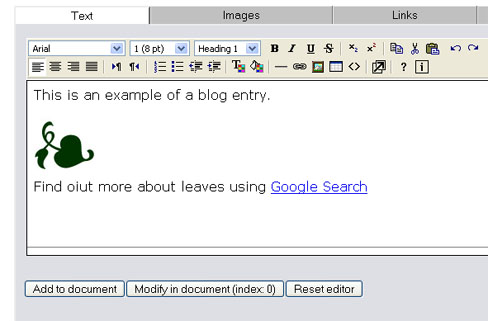
You should see your text appear back in the blog editor area. Click on the "insert/modify image" icon. Paste your URL into the Insert Image window.

Click "Okay" and your image should appear in the blog editor.
To update the blog, click on the "Modify
Click on Save. You have now added an image to the blog.
To add a link
In the blog editor, type out the text you would like to create a text link with.
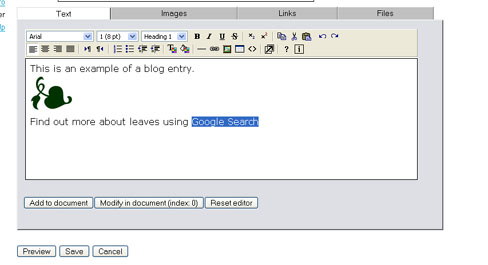
Highlight the text that you would like students to click on. Click the link icon in the blog editor.
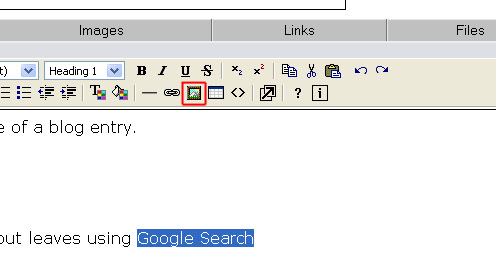
A "Insert/Modify Link" pop-up window should appear. Type in the URL for the web site. Click "Okay".
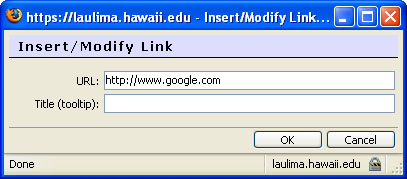
Your text should now be linked.
Click the "Modify in document" button to update your blog. And click "Save". You have now added a web link to your blog.
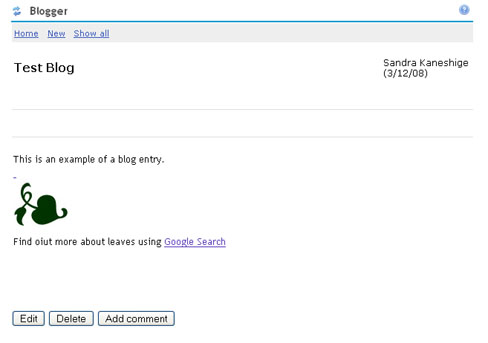
Students at this point can then add comments to the blog by clicking on the "Add comment" button.
Return to Main Tutorial Menu