

Laulima Faculty Tutorials
Uploading Multiple Files & Folders via WebDAV for Windows XP> Return to Laulima Faculty Tutorials
Uploading files with WebDAV using Windows XP:
To transfer a folder or multiple single files into a course, set up a WebDAV connection which allows for multiple files/folder uploading.
Depending on the Windows version (2000, XP or Vista) accessing Internet Connections may differ, but the process of creating the connection will be the same.The following screen shots were done on XP using Firefox 3 browser: (NOTE: connecting using WebDAV on Vista you MUST download and install the following Windows Update from Microsoft: http://www.microsoft.com/downloads/details.aspx?FamilyId=17C36612-632E-4C04-9382-987622ED1D64&displaylang=en).
Macintosh users can utilize this same technology by downloading "Goliath" from http://www.webDAV.org (over on the right select the link for "Goliath", then choose "Download") or if running Jaguar and above use "Connect to Server" feature.
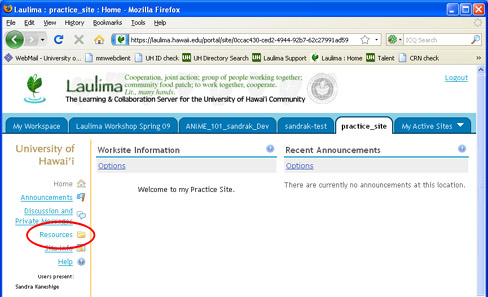
1. Create a WebDAV connection to the Resource folder of the course (this allows for copying multiple files from your local computer to Laulima using a drag and drop process) by logging into Laulima (https://laulima.hawaii.edu), selecting the course or project site, then clicking on "Resources" in the Course Menu
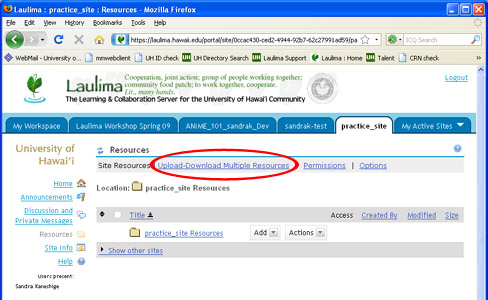
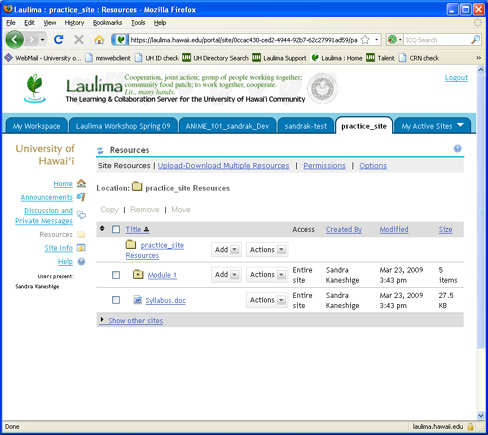
2. Using the menu bar select the link for "Upload-Download Multiple Resources".
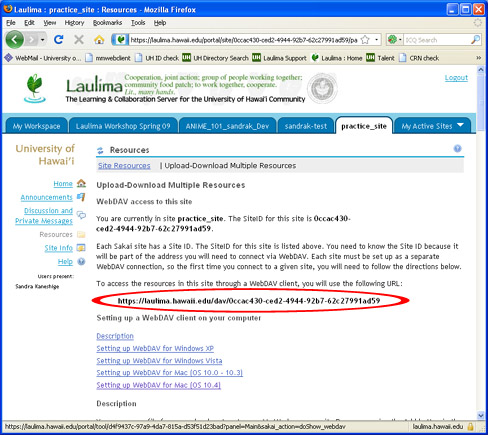
3. For WINDOWS XP highlight the URL under the message, "To access the resources in the site through a WebDAV client, you will use the following URL:" (if you continue to scroll down the Laulima screen you will find directional information on how to upload using Vista as well as Macintosh operating systems)
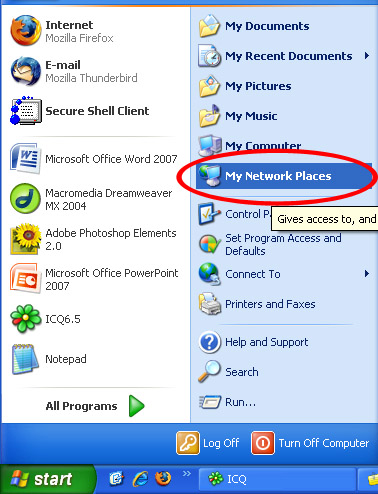
4. Go to the start menu and click on "My Network Places". If you do not see "My Network Places" in the Start menu, you should be able to open "My Computer" and see a link on the left for "My Network Places".
5. In the "My Network Places" window, click on the "Add a network place" link at the top of the Network Tasks list.

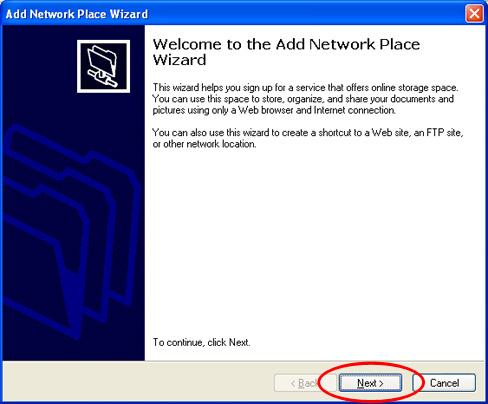
6. The "Add Network Place Wizard" window should then appear. Click on the "Next" button to begin the wizard.
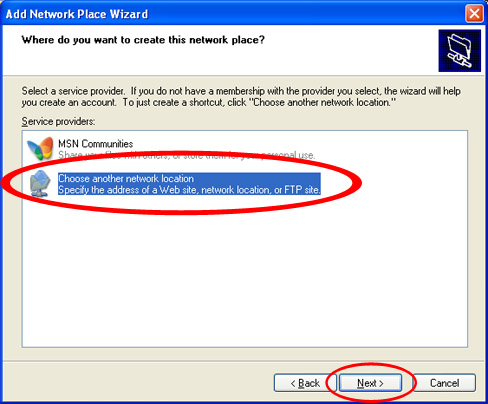
7. You will then be asked "Where do you want to create this network place?". Select "Choose another network location". And then click the "Next" button.
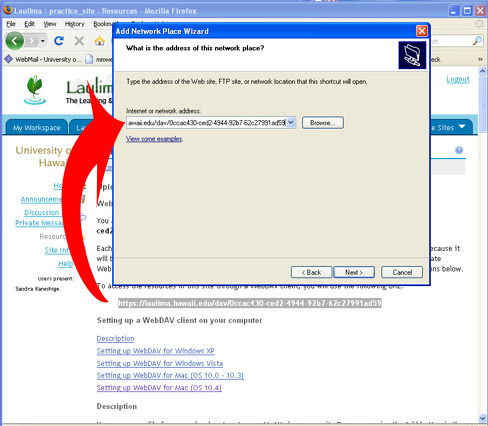
8. You will then be asked, "What is the address of this network place?" In the box, paste the URL that you had copied from your Resources area. After you paste the URL into the box, click the "Next" button.
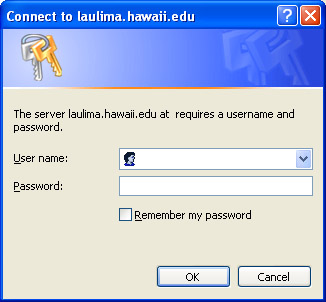
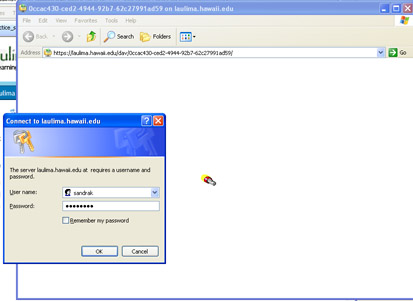
9. You will be asked to log in, type in your UH username and associated password, click OK when done
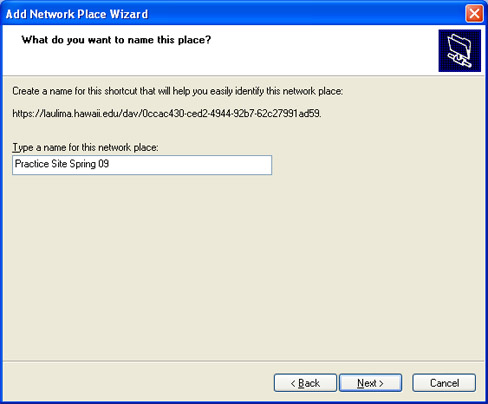
10. After logging in, the wizard will ask you, "What do you want to name the place?". You can rename it to something that will help you remember which course the link is for. For instance, you may want to rename it, "ART-101 Spring 09". Remember, if you are linking to a specific course, the same course you teach the next semester will require a new WebdAV link because it is in a different course. Once you have your title for the network place, click the "Next" button.
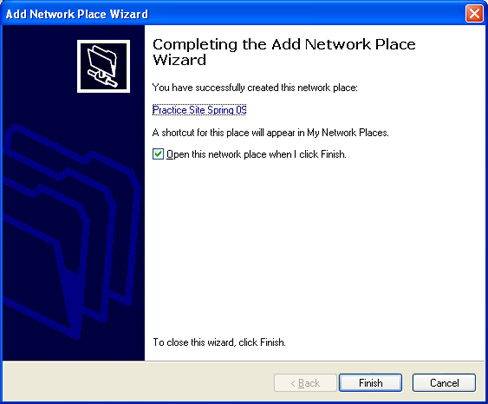
11. You will then have finished setting up your WebDAV connection for your site. The option to automatically open the WebDAV window will checked by default. Just click the "Finish" button to open the WebDAV window.
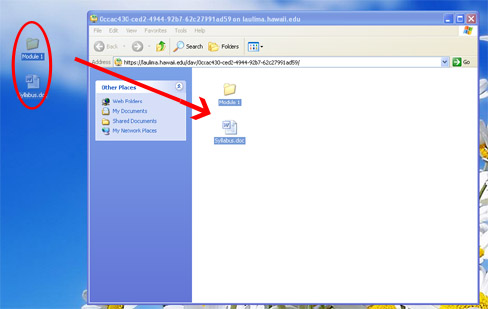
12. WebDAV will connect with the resources folder in this particular Laulima course allowing you to drag/drop files/folders into the opened WebDAV window for uploading
*Note: If you see the webdav window open with the flashlight icon moving over it for more than a few seconds, you may have to look for another login window. This second login window may be "hiding" behind other windows. You will need to login with your UH username and password again in order to access the webdav window.
13. Drag your files from your computer into the webdav window and wait for them to finish copying.
14. Once files have been uploaded you can close the WebDAV window, return back to https://laulima.hawaii.edu and proceed to link the uploaded files to its appropriate tool (for example: linking an uploaded file to the Syllabus Tool)
*Note: If you would like to upload more files later, the WebDAV link will still be in your "My Network Places". You can double click on the WebDAV connection you made earlier and login again to upload/download or delete files.

