Enabling the OpenSSH Client (SSH) on Windows
Overview
Starting with Windows 10 1803 (build 17134), Microsoft has enabled OpenSSH within the Command Prompt application as an optional feature.
System Requirements
- Windows 10 version 1803 (build 17134) and above.
Enabling the OpenSSH Client on Windows 10
You can enable the OpenSSH Client on your Windows 10 device through the following steps:
-
Open the Start menu and search for “Manage optional features”.
-
The “Optional features” menu lists out features already installed on your device under Installed features. If the OpenSSH Client is listed, the feature has already been enabled and no further action is necessary. If the OpenSSH Client is not listed, choose “Add a feature”.
-
In the following menu, search for "OpenSSH Client".
- Click on the checkbox next to OpenSSH Client and then click Install.
- Windows will then install the OpenSSH client. Once completed, the feature will be listed under Installed features and will be ready to use.
Enabling the OpenSSH Client on Windows 11
You can enable the OpenSSH Client on your Windows 11 device through the following steps:
-
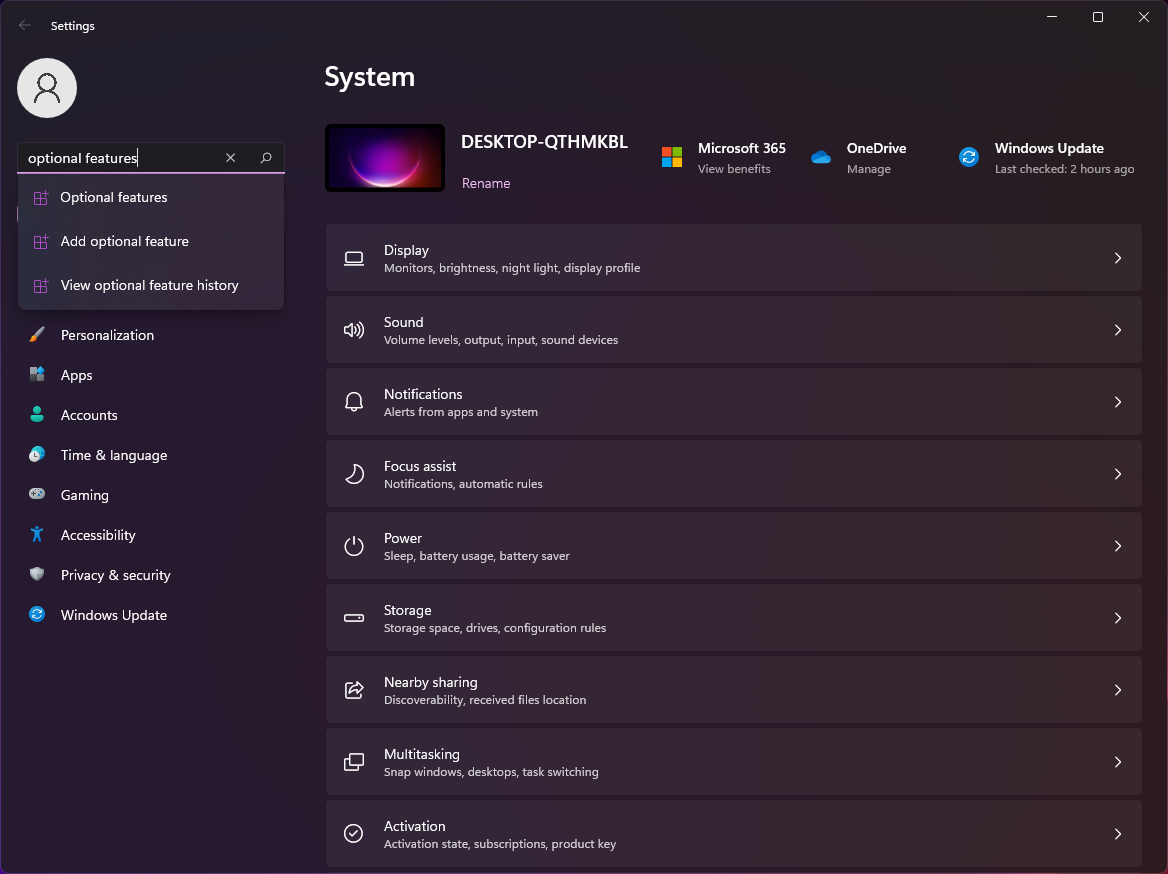
Open the Settings application and search for “Optional features”.

-
The Manage optional features menu lists out features already installed on your device under Installed features. If the OpenSSH Client is listed, the feature has already been enabled and no further action is necessary. If the OpenSSH Client is not listed, choose “View features”.

-
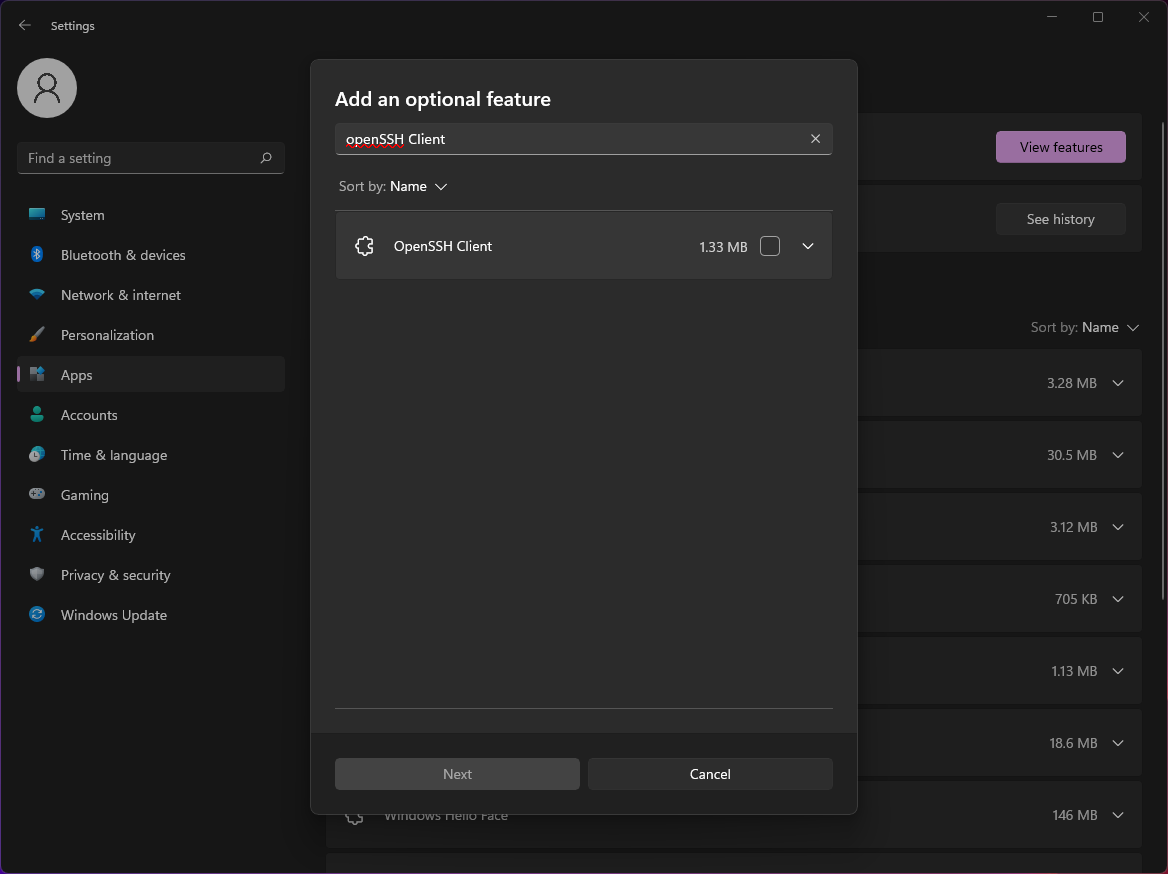
In the following menu, search for “OpenSSH Client”.

-
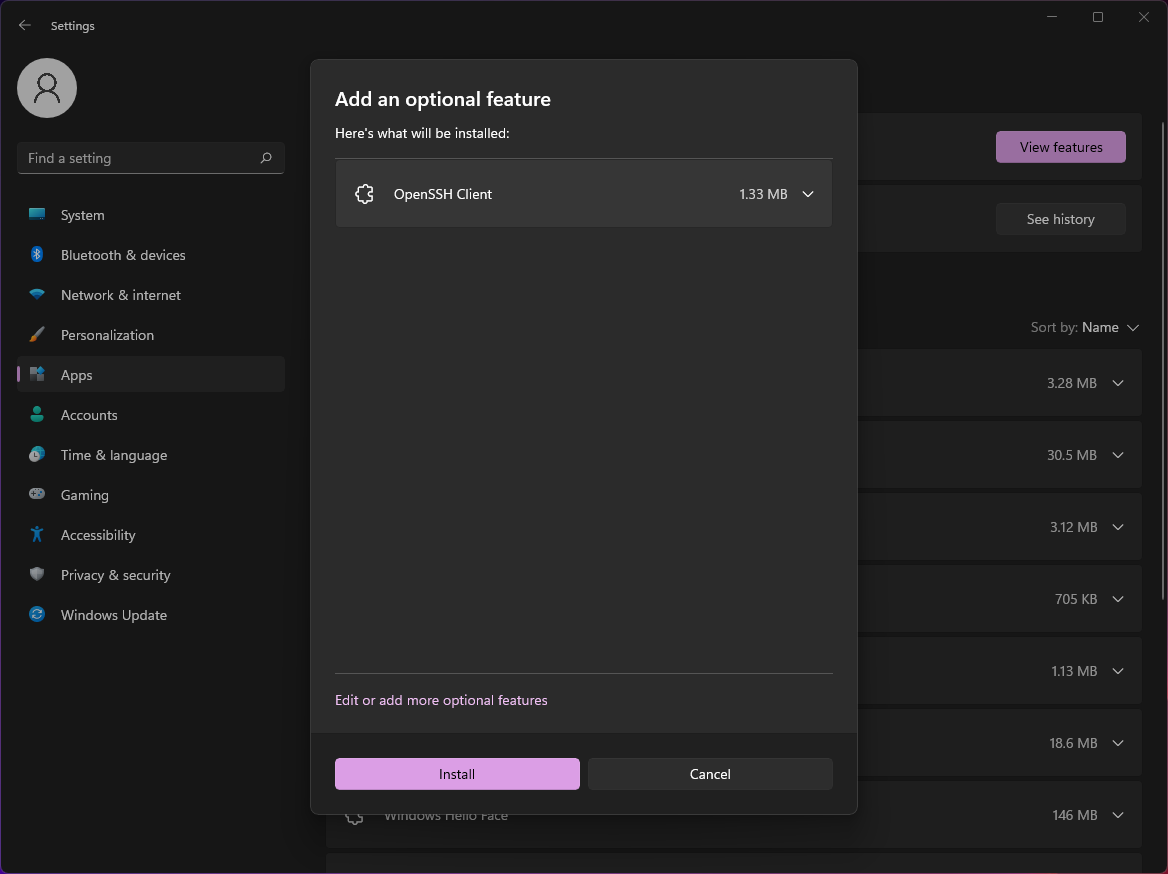
Click on the checkbox next to OpenSSH Client and then click “Next”. In the following window, click “Install” to confirm the installation.

- Windows will then install the OpenSSH client. Once completed, the feature will be listed under Installed features and will be ready to use.
Using the OpenSSH Client to Access UHUNIX
You can use the OpenSSH Client in Windows to access your UHUNIX account through the following steps:
- Open the Command Prompt application.
-
In the Command Prompt application, type the following command:
"ssh <username>@uhunix.hawaii.edu"
where<username>is your UH username.-
If this is the first time you are connecting to your UHUNIX account through SSH on your Windows device, you will receive a message like the following:
"The authenticity of host 'uhunix.hawaii.edu (128.171.24.203)' can't be established. ECDSA key fingerprint is SHA256:Sdod2cQGzoc8HQqkdYYa5yS4D/JBDvtiISeRWsdzncE. Are you sure you want to continue connecting (yes/no/[fingerprint])?". - If you receive this message, type “yes” and press the enter key.
-
- When prompted, type the password to your UH account and then press the enter key. You will then be connected to your UHUNIX account.
Using the OpenSSH Client for SFTP
The OpenSSH Client also allows the use of SFTP within the Command Prompt application. To use the OpenSSH Client as a SFTP client, please use the following instructions:
- Open the Command Prompt application.
-
In the Command Prompt application, type the following command:
"sftp <username>@uhunix.hawaii.edu"
where<username>is your UH username.- If this is the first time you are connecting to your UHUNIX account through SSH on your Windows device, you will receive a message like the following:
"The authenticity of host 'uhunix.hawaii.edu (128.171.24.203)' can't be established. ECDSA key fingerprint is SHA256:Sdod2cQGzoc8HQqkdYYa5yS4D/JBDvtiISeRWsdzncE. ECDSA key fingerprint is MD5:26:5a:84:94:02:b8:c0:ec:87:75:af:94:ee:47:f3:25. Are you sure you want to continue connecting (yes/no)?" - If you receive this message, type “yes” and press the enter key.
- If this is the first time you are connecting to your UHUNIX account through SSH on your Windows device, you will receive a message like the following:
- When prompted, type the password to your UH account and then press the enter key. You will then be connected to your UHUNIX account.
The OpenSSH client does not offer a graphical user interface (GUI) for SFTP. For instructions on how to install a SFTP client with a GUI, please see Askus article 1740.
Disabling the OpenSSH Client
You can disable the OpenSSH Client on your Windows device through the following steps:
- Open the Start menu and search for "Manage optional features".
- In the list of Installed features, click on OpenSSH Client and select Uninstall.
- Once the uninstall is complete, the OpenSSH Client will be disabled.


