

Scanning File Shares using Spirion (formerly Identity Finder)
By default, Spirion will only scan drives physically connected to the computer. If you want Spirion to scan network drives, you must set Spirion to scan custom locations.
Scanning custom locations is a two-step process: Allowlisting the location, then choosing to scan the custom location.
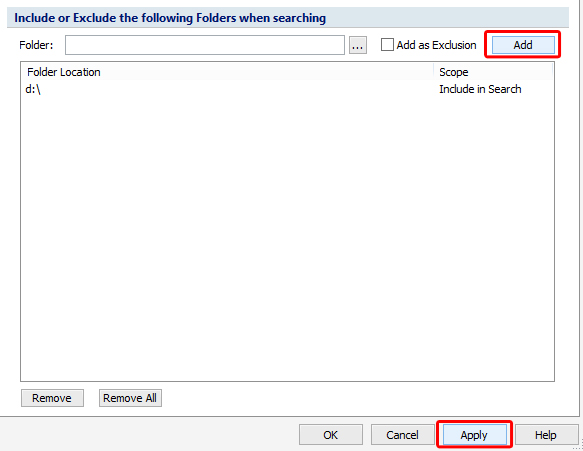
Allowlisting Custom Locations
- From the Advanced panel, go to Configuration, then select Settings
- Select "Custom Folders" from the left panel of the window that pops up
- Click on the triple-dot button right next to the field to input a folder path
- Select the folder or drive you want Spirion to Scan, then press OK
- Press Add, then Apply.


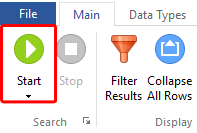
Choosing Custom Scan Locations
- From the Advanced panel, go to the Locations tab
- Select "Custom Folders" in the ribbon bar at the top
- Start the Scan


This will set the scanner to scan ONLY the folders listed in the Custom Folders list
If you want to scan the computer's drives AND the network drives or other custom locations, you must add ALL of the drives to the Custom Folders list, or else they won't be scanned when choosing the Custom Folders location for scans.
